How to Replace the Car Player in Toyota Alphard 2023
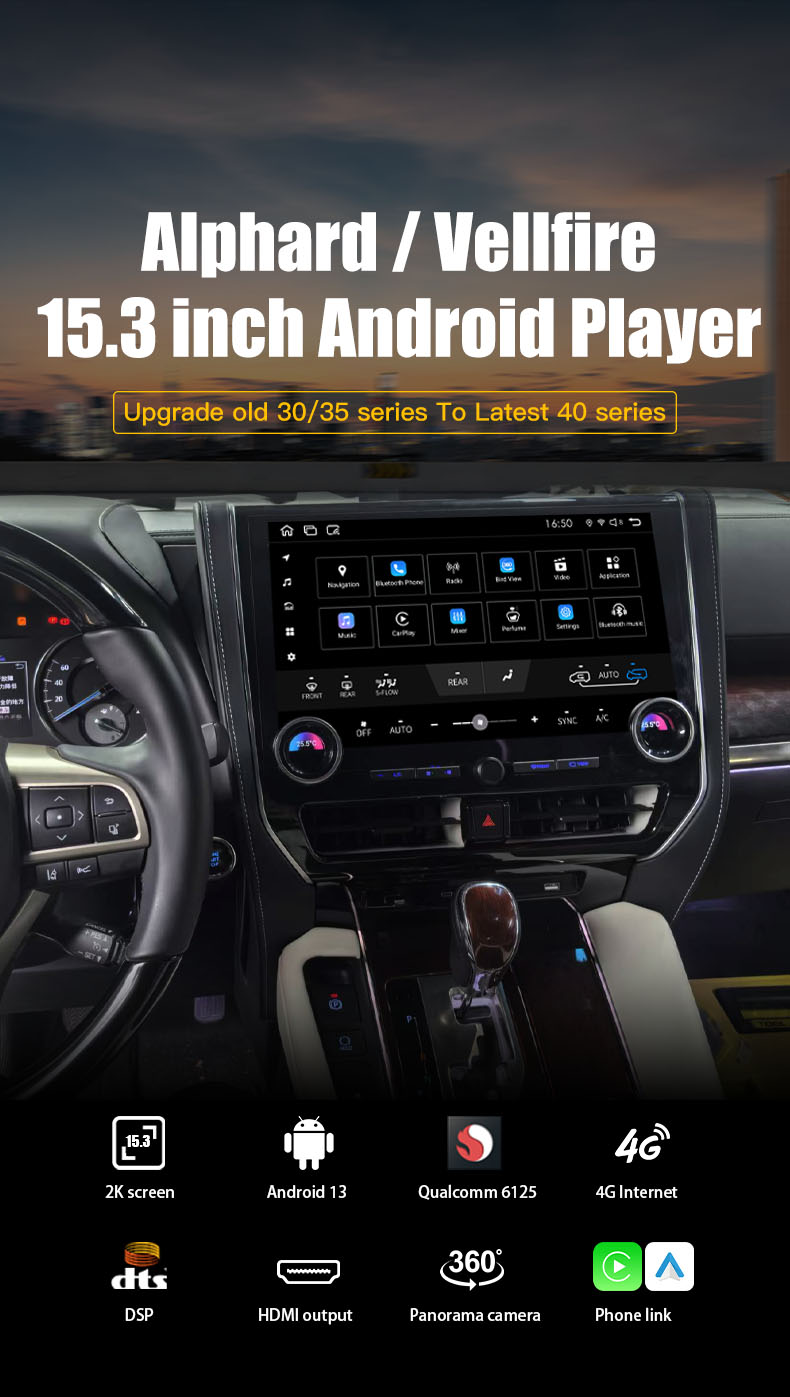
Upgrading your Toyota Alphard 2023 car player can transform your driving experience. A modern head unit brings advanced features like seamless smartphone integration, superior audio quality, and a more intuitive infotainment system. Whether you’re a tech enthusiast or simply want better connectivity, this change makes a noticeable difference. Brands like Audiosources offer reliable options tailored for Toyota vehicles. For those considering a Toyota Alphard upgrade 30/35 series to 40 car GPS, this replacement also ensures compatibility with navigation systems, enhancing convenience on the road. With the right tools and guidance, you’ll enjoy a smoother, more enjoyable ride.
Key Takeaways
Upgrading your Toyota Alphard's car player enhances your driving experience with better audio quality and advanced features like smartphone integration.
Gather essential tools such as screwdrivers, trim removal tools, and a wiring harness adapter to ensure a smooth installation process.
Disconnect the car battery before starting the replacement to prevent electrical shocks and protect your vehicle's electronics.
Label all wires during disconnection to simplify the reconnection process and avoid confusion later on.
Test the new head unit thoroughly before reassembling the dashboard to ensure all features work correctly.
Check compatibility of the new head unit with your Toyota Alphard to retain essential functions like steering wheel controls and reverse cameras.
If you encounter persistent issues or feel overwhelmed, consider seeking professional assistance to ensure a proper installation.
Tools and Materials Needed for Toyota Alphard 2023 Car Player Replacement
Before diving into the replacement process, you’ll need to gather the right tools and materials. Having everything ready ensures a smoother installation and minimizes interruptions.
Essential Tools
You’ll need a few basic tools to get started. These are must-haves for safely removing and installing the car player:
Screwdrivers (Phillips and flathead): Use these to remove screws securing the factory head unit and other components.
Trim removal tools: These help you detach the dashboard panels without causing scratches or damage.
Socket wrench set: This tool is essential for loosening bolts that hold the head unit in place.
Electrical tape: Use this to secure wiring connections and prevent short circuits.
Materials and Accessories
The right materials ensure compatibility and a seamless upgrade to your Toyota Alphard’s infotainment system. Here’s what you’ll need:
New head unit (e.g., Audiosources car player): Choose a model that fits your needs, whether it’s better sound quality or advanced features like GPS navigation.
Wiring harness adapter: This connects the new head unit to your car’s electrical system without cutting or splicing wires.
Mounting kit (specific to Toyota Alphard 2023): A proper mounting kit ensures the new unit fits securely in the dashboard.
Antenna adapter (if required): Some head units may need an adapter to connect to the car’s antenna for radio functionality.
Optional Tools
While not mandatory, these tools can make the process easier and more professional:
Multimeter for testing connections: Use this to check for proper voltage and ensure all connections are working correctly.
Heat shrink tubing for secure wiring: This provides extra protection for your wires, reducing the risk of loose connections or damage over time.
Pro Tip: If you’re unsure about the quality of your tools or materials, consider visiting a trusted service provider like Prestige Carcare. They use manufacturer-approved equipment and genuine parts, ensuring your vehicle’s integrity and performance remain intact.
By preparing these tools and materials in advance, you’ll set yourself up for a hassle-free installation. Take your time to double-check everything before starting the replacement process.
Step-by-Step Guide to Head Unit Replacement

Upgrading your Toyota Alphard’s infotainment system can feel like a big task, but breaking it into simple steps makes it manageable. Follow this guide to complete the head unit replacement smoothly and safely.
Preparing for the Replacement
Before diving in, preparation is key. A little planning ensures the process goes off without a hitch.
Disconnect the car battery to ensure safety.
Start by disconnecting the car battery. This step protects you from electrical shocks and prevents any damage to the vehicle’s electronics. Locate the battery under the hood, loosen the negative terminal with a wrench, and carefully remove it.
Gather all tools and materials in a well-lit workspace.
Set up your workspace with all the tools and materials you’ll need. A well-lit area helps you see small details, like wiring connections. Lay out your screwdrivers, trim removal tools, socket wrench, and the new head unit. Double-check that you have the wiring harness adapter and mounting kit ready.
Tip: If you’re unsure about the tools or materials, refer to the user manual of your new head unit. Many models, especially Android radios, include detailed guides to help you prepare.
Removing the Factory Infotainment System
Taking out the factory-installed unit requires patience and care. Rushing this step could damage the dashboard or wiring.
Use trim removal tools to carefully remove the dashboard panel.
Gently pry off the dashboard panel using trim removal tools. These tools prevent scratches and keep the panel intact. Work slowly around the edges until the panel pops free.
Unscrew and disconnect the factory head unit.
Once the panel is off, locate the screws securing the factory head unit. Use a Phillips screwdriver to remove them. Pull the unit out slightly to access the wiring at the back. Disconnect each wire by pressing the release tabs.
Label all wires for easy reconnection.
Label the wires as you disconnect them. This step saves you time and confusion later. Use masking tape and a marker to note which wire connects where.
Pro Tip: If you’re upgrading to a more advanced infotainment system, like one with GPS navigation, labeling wires ensures compatibility during installation.
Installing the New Toyota Alphard 2023 Car Player
With the old unit out, it’s time to install your new head unit. This part of the process brings your upgrade to life.
Connect the wiring harness adapter to the new head unit.
Attach the wiring harness adapter to the new head unit. This adapter bridges the connection between your car’s electrical system and the new unit. It eliminates the need for cutting or splicing wires, making the process easier and safer.
Secure the new unit using the mounting kit.
Slide the new head unit into the dashboard opening. Use the mounting kit specific to the Toyota Alphard 2023 to secure it in place. Tighten the screws to ensure the unit doesn’t move while driving.
Reconnect all wires and test the unit before reassembling the dashboard.
Reconnect the labeled wires to their corresponding ports on the new head unit. Once everything is connected, test the unit. Turn on the car battery and check the display, sound, and other features. If everything works, proceed to reassemble the dashboard panel.
Reminder: Testing the unit before reassembly saves you from having to take everything apart again if something doesn’t work.
By following these steps, you’ll complete the head unit replacement with confidence. Take your time, stay organized, and enjoy the upgraded infotainment system in your Toyota Alphard.
Finalizing the Installation
Reattach the dashboard panel and ensure all components are secure.
Now that the new head unit is in place, it’s time to reassemble the dashboard. Carefully align the dashboard panel with its original position. Press it gently but firmly until you hear it snap into place. Make sure every edge fits snugly, and there are no gaps or loose sections. If you encounter resistance, double-check the alignment to avoid damaging the panel.
Take a moment to inspect all the components you’ve reattached. Ensure the screws are tight, the mounting kit is secure, and the wiring is tucked neatly behind the panel. A clean and organized setup not only looks professional but also prevents potential issues down the road.
Tip: If you’re using an Android radio or a similar advanced unit, refer to the user-friendly guide included in the package. These guides often provide helpful diagrams for reassembly.
Reconnect the car battery and test the new car player.
With the dashboard reassembled, reconnect the car battery. Start by attaching the negative terminal back to its post. Tighten it securely with a wrench to ensure a stable connection. Once the battery is reconnected, turn on your car and power up the new head unit.
Test every feature of the new car player. Check the display, audio quality, and connectivity options like Bluetooth or USB. If your new unit includes navigation, verify that the GPS works correctly. Explore the settings menu to customize the infotainment system to your preferences.
If something doesn’t work as expected, don’t panic. Double-check the wiring connections and consult the user manual for troubleshooting tips. Most modern head units, especially Android radios, are designed for easy setup and include detailed instructions to resolve common issues.
Pro Tip: Testing the system thoroughly now saves you from future headaches. If you notice persistent problems, consider seeking professional assistance to ensure everything is installed correctly.
By following these steps, you’ll complete the installation process with confidence. Enjoy the enhanced features and improved functionality of your upgraded infotainment system, making every drive more enjoyable and connected.
Ensuring Compatibility and Updating the Infotainment System
Upgrading your Toyota Alphard’s infotainment system is exciting, but ensuring compatibility is crucial for a smooth experience. Let’s walk through the steps to verify compatibility and update your system effectively.
Compatibility Checks
Verify that the new head unit is compatible with the Toyota Alphard 2023.
Before installing the new head unit, confirm it works seamlessly with your Toyota Alphard 2023. Check the product specifications or consult the manufacturer’s website. Look for details like size, wiring compatibility, and supported features. Many modern head units, such as Android-based systems, are designed to integrate with Toyota vehicles. They retain essential functions like steering wheel controls and reverse cameras, so you don’t lose any of your car’s original features.
Pro Tip: If you’re unsure about compatibility, reach out to a professional installer. They can guide you in selecting a unit that fits perfectly with your vehicle.
Check for any additional adapters or accessories required.
Some head units may need extra components to work correctly. For example, a wiring harness adapter ensures the new unit connects to your car’s electrical system without cutting wires. An antenna adapter might be necessary for radio functionality. Double-check if your chosen head unit requires these accessories. Having everything ready before installation saves time and avoids frustration.
Quick Tip: Many retailers offer bundle deals that include the head unit, wiring harness, and mounting kit. These packages simplify the process and ensure you have all the essentials.
Software Updates
Install the latest firmware for the new head unit.
Once the hardware is installed, focus on the software. Most modern infotainment systems come with firmware that may need updating. Visit the manufacturer’s website to download the latest version. Firmware updates often fix bugs, improve performance, and add new features. Follow the instructions provided by the manufacturer to install the update. This step ensures your system runs smoothly and efficiently.
Reminder: Always use a reliable USB drive or SD card for firmware updates. Interruptions during the process can cause issues with the system.
Sync the unit with your vehicle’s system for seamless operation.
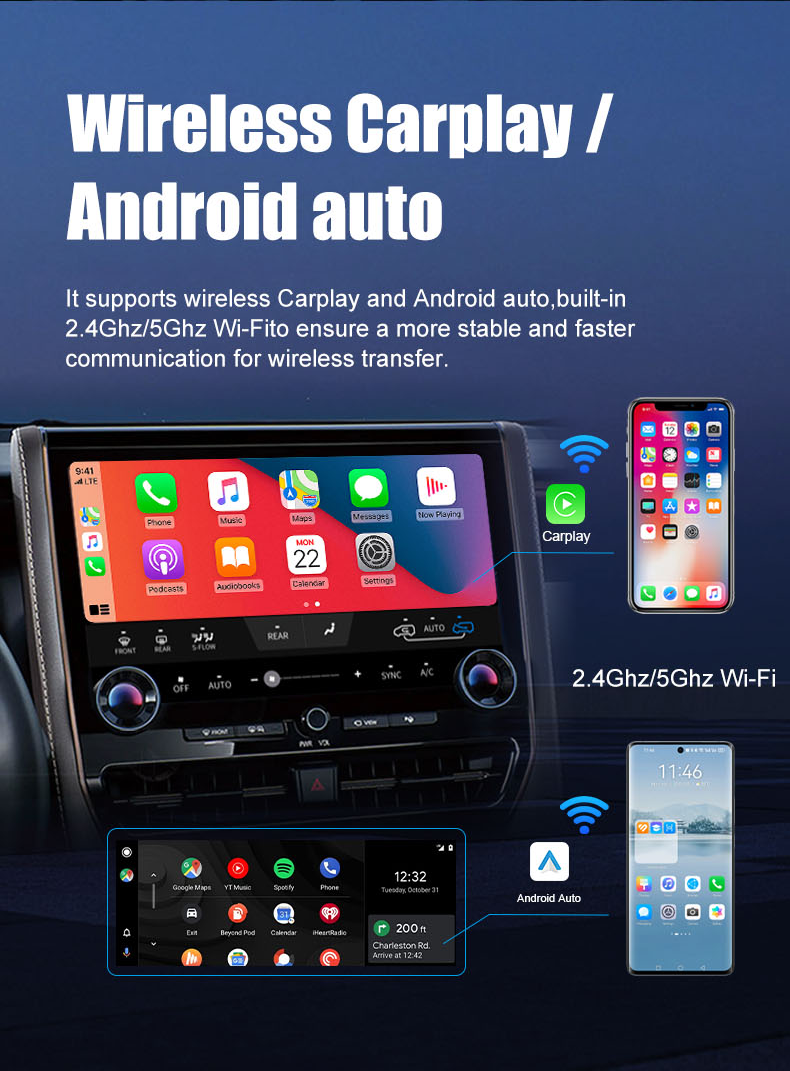
After updating the firmware, sync the new head unit with your Toyota Alphard’s system. Pair your smartphone using Bluetooth or USB to access features like navigation apps and music streaming. Android Auto or Apple CarPlay makes this process straightforward. These platforms let you use navigation apps directly on the head unit’s display, offering convenience and safety while driving.
Test all features, including the reverse camera and steering wheel controls. Ensure everything works as expected. If you encounter any issues, refer to the user manual or contact customer support for assistance.
Pro Tip: Take a few minutes to explore the settings menu. Customize the display, sound preferences, and connectivity options to suit your needs.
By following these steps, you’ll ensure your new infotainment system is fully compatible and up-to-date. Enjoy the enhanced functionality, better connectivity, and the convenience of navigation apps right at your fingertips.
Common Issues and Troubleshooting During Head Unit Replacement
Replacing the head unit in your Toyota Alphard 2023 can be a rewarding upgrade, but it’s not always smooth sailing. You might encounter a few hiccups along the way. Don’t worry—most issues are easy to fix with a little patience and the right approach. Let’s dive into some common problems and how you can troubleshoot them effectively.
Common Installation Problems
Loose or incorrect wiring connections
One of the most frequent issues during installation is loose or mismatched wiring. If the wires aren’t securely connected, the new head unit might not power on, or certain features like the bluetooth connection could fail to work. Incorrect wiring can also lead to distorted sound or a non-functional display. This often happens when the wiring harness adapter isn’t properly aligned with the car’s electrical system.
To avoid this, double-check each connection as you go. Make sure the wiring harness clicks into place and that no wires are left dangling. If you’re using a third-party adapter, ensure it’s compatible with your Toyota Alphard’s infotainment system.
Dashboard panels not fitting properly after installation
Another common problem is misaligned dashboard panels. After installing the new head unit, you might find that the panels don’t snap back into place or leave noticeable gaps. This usually happens if the mounting kit isn’t installed correctly or if the new unit is slightly larger or smaller than the factory one.
To fix this, inspect the mounting kit and ensure it’s the right size for your vehicle. Adjust the positioning of the head unit before reattaching the panels. If the issue persists, consider consulting the user manual or reaching out to the manufacturer for guidance.
Quick Tip: Some aftermarket head units, especially those purchased online, may require additional adjustments or accessories to fit perfectly. Always verify the dimensions and compatibility before starting the installation.
Troubleshooting Tips
Double-check all connections and labels
When something doesn’t work as expected, start by reviewing your wiring. Go through each connection and ensure it matches the labels you created during the removal process. Even a single misplaced wire can disrupt the entire system. If you skipped labeling, refer to the wiring diagram in the user manual of your new head unit.
Use a multimeter to test for power and signal issues
A multimeter is a handy tool for diagnosing electrical problems. Use it to check if the head unit is receiving power from the car’s battery. Set the multimeter to measure voltage and test the wires connected to the power source. If there’s no reading, the issue might lie with the wiring harness or the car’s electrical system.
You can also use the multimeter to test signal wires, ensuring they’re transmitting data correctly. This is especially useful for troubleshooting issues with the bluetooth connection or other advanced features.
Consult the user manual for the new head unit
When in doubt, turn to the user manual. Most modern head units come with detailed instructions and troubleshooting sections. These guides often include diagrams and step-by-step solutions for common problems. If you’re using an Android-based system, the manual might also provide tips for optimizing the infotainment system and ensuring compatibility with your vehicle.
Pro Tip: If the manual doesn’t resolve your issue, check online forums or contact the manufacturer’s customer support. Many users share their experiences and solutions, which can be incredibly helpful.
By addressing these common problems and following these troubleshooting tips, you’ll overcome most challenges during the head unit replacement process. Stay patient, take your time, and enjoy the satisfaction of upgrading your Toyota Alphard’s infotainment system.
When to Seek Professional Assistance for Toyota Alphard 2023 Car Player Installation
Upgrading your Toyota Alphard’s car player can be a rewarding DIY project, but sometimes, things don’t go as planned. Knowing when to call in a professional can save you time, effort, and potential frustration. Let’s explore the signs that indicate you might need expert help and the benefits of opting for professional installation.
Signs You Need Help
Difficulty understanding wiring diagrams
Wiring diagrams can feel overwhelming, especially if you’re not familiar with electrical systems. Misinterpreting these diagrams can lead to incorrect connections, which may cause the new head unit to malfunction or even damage your vehicle’s electronics. If you find yourself second-guessing every step or struggling to match wires, it’s a good idea to seek assistance. Professionals have the expertise to interpret these diagrams accurately and ensure everything is connected properly.
Quick Tip: Many modern head units come with user-friendly guides, but if you’re still unsure, don’t hesitate to consult an expert. It’s better to be safe than sorry when dealing with your car’s electrical system.
Persistent issues with the new unit after installation
Sometimes, even after following every step, the new car player might not work as expected. You might encounter problems like the display not turning on, poor sound quality, or features like Bluetooth and navigation not functioning. These issues could stem from loose connections, compatibility problems, or software glitches. If troubleshooting doesn’t resolve the problem, it’s time to call in a professional.
Pro Insight: At Brummstadt, experts often recommend resetting the system or updating the firmware to fix minor issues. However, persistent problems might require a deeper inspection to identify and resolve the root cause.
Benefits of Professional Installation
Ensures proper setup and avoids potential damage
Professionals bring experience and specialized tools to the table. They know how to handle delicate components, secure wiring, and fit the new head unit seamlessly into your dashboard. This reduces the risk of damaging your car’s interior or electrical system. A professional installation also ensures that all features of your new infotainment system, such as steering wheel controls and reverse cameras, work perfectly.
Did You Know? Many professional installers test the system thoroughly before handing the car back to you. This includes checking the display, sound, and connectivity to ensure everything functions as it should.
Saves time and effort for complex installations
Installing a car player can be time-consuming, especially if you’re unfamiliar with the process. From removing the factory unit to connecting wires and testing the system, it requires patience and precision. Professionals can complete the job efficiently, saving you hours of trial and error. This is particularly helpful if your new head unit has advanced features like Android Auto or Apple CarPlay, which may require additional setup steps.
Pro Tip: Some service providers, like Prestige Carcare, offer packages that include installation, testing, and even post-installation support. This ensures a hassle-free experience and peace of mind.
By recognizing when to seek professional help, you can avoid unnecessary stress and enjoy the benefits of your upgraded infotainment system without any hiccups. Whether it’s interpreting wiring diagrams or troubleshooting persistent issues, professionals have the skills and tools to get the job done right.
Replacing the toyota alphard 2023 car player is a rewarding project that upgrades your driving experience. By following this guide, you can complete the replacement with ease and enjoy a modern infotainment system. Take your time during each step to ensure everything fits and functions properly. Use high-quality products like those designed for the toyota alphard 2023 car player to guarantee compatibility and performance. If you encounter challenges, don’t hesitate to seek professional help. This replacement not only enhances your vehicle but also makes every drive more enjoyable.
FAQ
How do I know if a new car player is compatible with my Toyota Alphard 2023?
You can check the specifications of the new car player to ensure it matches the dimensions and wiring setup of your Alphard. Look for details like compatibility with steering wheel controls, reverse cameras, and other factory features. Many modern units, including those with android auto, are designed to integrate seamlessly with the Alphard. If you're unsure, consult the user manual or reach out to the manufacturer for confirmation.
Can I install android auto on my Toyota Alphard 2023?
Yes, you can install android auto on your Alphard by upgrading to a compatible head unit. Most aftermarket car players support android auto, allowing you to connect your smartphone for navigation, music, and hands-free calls. Ensure the unit you choose explicitly mentions android auto compatibility. Once installed, you can enjoy a more connected driving experience.
Do I need special tools to replace the car player in my Alphard?
Yes, you’ll need specific tools like screwdrivers, trim removal tools, and a socket wrench set. These tools help you safely remove the factory unit and install the new one without damaging the dashboard. Optional tools like a multimeter can also assist in testing connections. Having the right tools ensures a smoother installation process for your Alphard.
Is it necessary to disconnect the battery before replacing the car player?
Yes, disconnecting the battery is essential for safety. It prevents electrical shocks and protects your Alphard’s electronics during the replacement process. Always disconnect the negative terminal first and reconnect it only after completing the installation.
Can I use android auto wirelessly in my Alphard?
Yes, many modern head units with android auto offer wireless connectivity. However, this depends on the specific model you choose. Check the product description to confirm if wireless android auto is supported. If your Alphard’s new car player includes this feature, you can connect your smartphone without using a USB cable.
What should I do if the dashboard panels don’t fit after installation?
If the panels don’t fit properly, check the mounting kit and the alignment of the new head unit. The Alphard requires a specific mounting kit to ensure a snug fit. Adjust the positioning of the unit and reattach the panels carefully. If the issue persists, consult the user manual or seek professional assistance.
How can I update the firmware on my new car player?
To update the firmware, visit the manufacturer’s website and download the latest version for your head unit. Use a USB drive or SD card to transfer the update to the car player. Follow the instructions provided by the manufacturer to complete the process. Keeping the firmware updated ensures optimal performance and compatibility with features like android auto.
Why isn’t my new car player powering on after installation?
If the new car player doesn’t power on, check the wiring connections. Loose or incorrect wiring is a common issue. Use a multimeter to test for power at the connection points. Ensure the wiring harness adapter is securely attached to your Alphard’s electrical system. If the problem persists, consult the user manual or contact customer support.
Can I still use the factory reverse camera with the new head unit?
Yes, most aftermarket head units support factory reverse cameras. Ensure the new car player is compatible with your Alphard’s camera system. You may need an additional adapter to connect the camera to the new unit. Once installed, test the camera to confirm it works correctly.
Should I choose android auto or Apple CarPlay for my Alphard?
The choice depends on your smartphone. If you use an Android device, android auto is the better option. It provides seamless integration with apps like Google Maps, Spotify, and messaging services. For iPhone users, Apple CarPlay offers similar functionality. Many modern head units support both, so you can choose based on your preference.
See Also
Transform Your Driving Experience with Mercedes Vito DVD Player
Upgrade Your Mercedes-Benz with Advanced DVD Player Technology
Boost Your Mercedes-Benz with a Touchscreen DVD Player
Revamp Your Volkswagen with Touchscreen Climate Control System
Exploring Apple CarPlay Integration with Indian Motorcycle Audio
Follow Us
Audiosources shenzhen Limited is a high technlogy manufacture which was founded in 2006 yeas. The company's main products include Android car dvd player, carplay ai box, car climate panel, carplay screen,ect.
We have our own R&D team,can delop the OEM and ODM projects for different demand. we already did ODM products for Mecerdes Benz, Volkswagen, Toyota brand cars. welcome to inquiry and order. Thanks.
Address
3rd Floor, Building 1, Haopeng Wisdom Park, No. 141-1 Furui Road, Xintian Community, Fuhai Street, Baoan District, Shenzhen,Guangdong , China
Contacts
marketing@audiosources.net
+86 134 3478 4461