Vellfire Alphard Update to New 40 Series Made Easy
Upgrading your Vellfire or Alphard to a new 40 series Android head unit transforms your driving experience. This modern system offers features like Apple CarPlay, Android Auto, and high-resolution displays. You’ll enjoy seamless smartphone integration, enhanced navigation, and premium audio quality. The 40 series head unit fits perfectly into your vehicle’s dashboard, maintaining its sleek design. With its plug-and-play setup, the process becomes simple and hassle-free. Whether you’re looking for better entertainment or improved functionality, this Vellfire Alphard update to new 40 series Android head unit brings a fresh, tech-savvy touch to your car.
Key Takeaways
Upgrading to the 40 series Android head unit enhances your driving experience with features like Apple CarPlay, Android Auto, and high-resolution displays.
Gather essential tools such as screwdrivers, trim removal tools, and a multimeter to ensure a smooth installation process.
Verify your vehicle's compatibility by checking the model and year, and ensure the head unit supports existing features like steering wheel controls.
Follow a step-by-step installation guide to safely remove the old head unit and install the new one, ensuring all connections are secure.
Post-installation, configure system settings, connect to Wi-Fi, and install apps to fully optimize your new head unit's capabilities.
Troubleshoot common issues like loose wiring or display glitches by checking connections and consulting the user manual for guidance.
Enjoy the modern aesthetic and improved functionality of your vehicle, making every drive more enjoyable and connected.
Tools and Materials Needed for the Vellfire Alphard Update to New 40 Series Android Head Unit

Upgrading your vehicle requires the right tools and materials. Having these on hand ensures a smooth installation process and helps you avoid unnecessary delays. Let’s break down what you’ll need.
Required Tools
To get started, gather a few essential tools. These will help you remove the old head unit and install the new one with ease. Here’s a list of what you’ll need:
Screwdrivers: A set of Phillips and flathead screwdrivers for removing screws and panels.
Trim Removal Tools: Plastic tools designed to safely remove dashboard panels without causing scratches.
Socket Wrench Set: Useful for loosening bolts that secure the head unit in place.
Automatic Window Lifter: This tool can assist in managing power windows during the installation process.
Multimeter: Handy for checking electrical connections and ensuring proper wiring.
Having these tools ready will save you time and make the process more efficient.
Materials and Components
The materials you use are just as important as the tools. They ensure compatibility and functionality with your Toyota Alphard or Vellfire. Here’s what you’ll need:
40 Series Android Head Unit: The centerpiece of your upgrade. Make sure it’s specifically designed for the Toyota Alphard/Vellfire to ensure a perfect fit.
Wiring Harness: A plug-and-play harness simplifies the connection process and avoids cutting or splicing wires.
Mounting Brackets: These secure the new head unit in place and maintain the dashboard’s sleek appearance.
Black Color Trim Pieces: These may be necessary to match the interior design of your vehicle.
User Manual: Always keep the manual that comes with the head unit. It provides valuable guidance during installation.
Specifications of the 40 Series Android Head Unit
Before purchasing the head unit, it’s important to understand its specifications. This ensures it meets your needs and integrates seamlessly with your vehicle. Here are some key features to look for:
Car Model Compatibility: Designed specifically for the 40 series Alphard/Vellfire models.
Display Quality: High-resolution screens for a crisp and clear viewing experience.
Features: Look for built-in GPS navigation, Apple CarPlay, Android Auto, and support for apps.
Audio Enhancements: Some units include built-in DSP (Digital Signal Processing) for superior sound quality.
Warranty: A 1-year warranty offers peace of mind in case of defects or issues.
Minimum Order Quantity (MOQ): Most retailers allow you to purchase a single unit, making it accessible for individual upgrades.
By understanding these specifications, you can choose a head unit that enhances your driving experience while maintaining compatibility with your vehicle.
How to Check Compatibility for the Vellfire Alphard Update to New 40 Series Android Head Unit
Ensuring compatibility is a crucial step before upgrading your vehicle's head unit. By confirming that your Toyota Alphard or Vellfire supports the 40 series Android head unit, you can avoid installation issues and enjoy a seamless experience. Let’s dive into how you can check compatibility.
Identifying Your Vehicle Model and Year
The first step is to determine your vehicle's model and production year. This information helps you confirm whether the 40 series Android head unit is designed to fit your car. You can find these details in your vehicle registration documents or by checking the label on the driver-side door frame.
Toyota Alphard and Vellfire models vary slightly depending on the year of manufacture. For instance, newer models often feature advanced systems like a 12.3-inch digital instrument cluster or a 14-inch infotainment display. These features indicate that your vehicle is likely compatible with the 40 series head unit. If your car includes these modern components, the upgrade process becomes even more straightforward.
Pro Tip: If you're unsure about your vehicle's specifications, consult your owner's manual or contact your local Toyota dealership for assistance.
Verifying Compatibility with the 40 Series Head Unit
Once you’ve identified your vehicle model and year, the next step is to verify the compatibility of the 40 series Android head unit. Start by checking the product description of the head unit you plan to purchase. Look for mentions of compatibility with Toyota Alphard or Vellfire models. Many retailers, such as Shopee or Alibaba, provide detailed specifications to help you make an informed decision.
Here are some key features to confirm:
Integration with Existing Systems: The 40 series head unit should support Android Auto and Apple CarPlay. These features allow seamless connectivity with your smartphone, enhancing navigation and entertainment options.
Vehicle-Specific Design: Ensure the head unit is tailored for the Alphard/Vellfire dashboard. A perfect fit maintains the sleek interior design of your car.
Support for Additional Features: Check if the head unit integrates with existing systems like steering wheel controls, rear cameras, or premium audio setups. For example, some models work with iDatalink Maestro RR/RR2 to display crucial vehicle information.
Display and Audio Compatibility: If your vehicle includes a high-resolution display or a JBL premium audio system, confirm that the head unit supports these features for optimal performance.
Quick Tip: Many online tutorials and YouTube videos demonstrate how to verify compatibility. Watching these can give you a clearer idea of what to expect during the upgrade.
By taking these steps, you ensure that the Vellfire Alphard update to new 40 series Android head unit will enhance your driving experience without any hiccups. A little preparation goes a long way in making the installation process smooth and hassle-free.
Step-by-Step Installation Guide for the Vellfire Alphard Update to New 40 Series Android Head Unit

Upgrading your vehicle’s head unit might seem intimidating, but breaking it into simple steps makes it manageable. Follow this guide to install the 40 series Android head unit in your Toyota Alphard or Vellfire with confidence.
Removing the Old Head Unit
The first step is to remove the existing head unit from your dashboard. Here’s how you can do it:
Disconnect the Battery: Start by disconnecting your car’s battery to avoid electrical issues. Use a socket wrench to loosen the negative terminal and set it aside.
Remove Dashboard Panels: Use trim removal tools to carefully pry off the panels surrounding the head unit. Work slowly to avoid damaging the dashboard.
Unscrew the Head Unit: Locate the screws securing the old head unit. Use a screwdriver to remove them and keep the screws in a safe place.
Unplug the Wiring: Gently pull the head unit out and disconnect all wiring harnesses and connectors. Take note of how the wires are connected for reference during installation.
Tip: Take pictures of the wiring connections before unplugging them. This will help you reconnect everything correctly later.
Preparing for Installation
Preparation ensures a smooth installation process. Before installing the new head unit, follow these steps:
Inspect the New Head Unit: Check the 40 series Android head unit for any visible damage. Ensure all components, such as the wiring harness and mounting brackets, are included.
Compare Connectors: Match the connectors on the new head unit with the ones in your vehicle. If they don’t align, you may need an adapter or a compatible wiring harness.
Test Fit the Unit: Place the new head unit into the dashboard opening to confirm it fits properly. Adjust the mounting brackets if necessary.
Prepare the Wiring Harness: Connect the wiring harness to the new head unit. Ensure the connections are secure and match the original setup.
Quick Reminder: Double-check the user manual that comes with the head unit. It often includes diagrams and instructions specific to your model.
Installing the 40 Series Android Head Unit
Now it’s time to install the new head unit. Follow these steps to complete the process:
Connect the Wiring: Plug the wiring harness into the vehicle’s connectors. Ensure all connections are secure and match the original configuration.
Secure the Head Unit: Slide the head unit into the dashboard opening. Align it with the mounting brackets and use screws to secure it in place.
Reattach Dashboard Panels: Snap the dashboard panels back into position. Use your trim removal tools to ensure a snug fit without damaging the panels.
Reconnect the Battery: Reconnect the car battery by attaching the negative terminal. Tighten it with a socket wrench.
Power On and Test: Turn on your vehicle and test the new head unit. Check features like the display, audio, and smartphone integration to ensure everything works as expected.
Pro Tip: If something doesn’t work, revisit the wiring connections. A loose or incorrect connection is often the cause of issues.
By following these steps, you’ll complete the Vellfire Alphard Update to new 40 series Android Head Unit installation. The process is straightforward when you’re prepared and take your time.
Post-Installation Setup for the Vellfire Alphard Update to New 40 Series Android Head Unit
Congratulations on completing the installation! Now it’s time to set up your new system and unlock its full potential. This post-installation setup ensures everything runs smoothly and enhances your driving experience.
Configuring the System
The first thing you’ll want to do is configure the system settings. This step customizes the head unit to match your preferences and ensures compatibility with your vehicle’s features. Follow these steps to get started:
Set the Language and Region: Turn on the head unit and select your preferred language and region. This ensures accurate navigation and system prompts.
Adjust Display Settings: Go to the display menu and tweak the brightness, contrast, and screen resolution. A well-adjusted display improves visibility during both day and night drives.
Connect to Wi-Fi: Access the settings menu and connect the head unit to a Wi-Fi network. This connection is essential for downloading updates and apps.
Pair Your Smartphone: Use Bluetooth to pair your phone with the head unit. This enables hands-free calls, music streaming, and access to apps like Apple CarPlay or Android Auto.
Sync Steering Wheel Controls: If your vehicle has steering wheel controls, ensure they’re synced with the head unit. Navigate to the control settings and map the buttons to their respective functions.
Pro Tip: Test each feature after configuring it. This helps you identify and fix any issues right away.
Installing Apps and Updates
Once the system is configured, you can install apps and updates to enhance functionality. Here’s how to do it:
Check for Firmware Updates: Go to the system settings and look for firmware updates. Download and install any available updates to ensure the head unit runs on the latest software version.
Install Navigation Apps: If the head unit doesn’t come with built-in navigation, download apps like Google Maps or Waze. These apps provide real-time traffic updates and reliable directions.
Add Entertainment Apps: Install apps like Spotify, YouTube, or Netflix for entertainment during long trips. Make sure to download content in advance if you plan to use these apps offline.
Enable Voice Assistants: Set up voice assistants like Google Assistant or Siri. These tools let you control the system hands-free, making your drives safer and more convenient.
Customize Shortcuts: Many head units allow you to create shortcuts for frequently used apps or settings. Organize these shortcuts on the home screen for quick access.
Quick Reminder: Only download apps from trusted sources to avoid malware or compatibility issues.
By completing these steps, you’ll fully optimize your Vellfire Alphard Update to new 40 series Android Head Unit. The system will feel intuitive, responsive, and tailored to your needs. Enjoy the enhanced navigation, entertainment, and connectivity features that make every drive more enjoyable.
Troubleshooting Common Issues During the Vellfire Alphard Update to New 40 Series Android Head Unit
Even with careful preparation, you might encounter some challenges during or after the installation process. Don’t worry—most issues are easy to resolve with a little troubleshooting. Let’s explore common problems and how you can fix them.
Installation Problems
Sometimes, things don’t go as planned during the installation. Here are a few common issues you might face and how to address them:
Loose Wiring Connections: If the head unit doesn’t power on, check the wiring harness. A loose or improperly connected wire is often the culprit. Reconnect the wires securely and test again.
Dashboard Panels Not Fitting Properly: If the panels don’t snap back into place, the head unit might not be aligned correctly. Remove it, adjust the position, and try again.
Missing Components: Before starting, double-check that all parts, like mounting brackets and screws, are included. If something is missing, contact the retailer or supplier for replacements.
Blown Fuse: If the head unit still won’t turn on, inspect your car’s fuse box. A blown fuse could interrupt the power supply. Replace it with a fuse of the same rating.
Quick Tip: Always disconnect the battery before troubleshooting electrical issues. This prevents accidental short circuits.
Post-Installation Issues
After installation, you might notice some features not working as expected. Here’s how to tackle these problems:
Steering Wheel Controls Not Responding: If the controls don’t work, check the settings in the head unit. You may need to manually map the buttons to their functions.
No Sound Output: If there’s no audio, verify the speaker connections. Ensure the wiring harness is properly connected to the car’s audio system.
Display Glitches: A flickering or unresponsive screen might indicate a software issue. Restart the head unit or perform a factory reset to resolve this.
Bluetooth Pairing Issues: If your phone won’t connect, delete any existing pairings and try again. Make sure Bluetooth is enabled on both devices.
Pro Tip: Keep the user manual handy. It often includes troubleshooting steps specific to your head unit model.
Solutions and Tips
To make troubleshooting easier, follow these practical tips:
Refer to Online Tutorials: Many YouTube videos and forums provide step-by-step solutions for common problems. Watching these can help you understand what went wrong.
Update the Firmware: Outdated software can cause glitches. Check for updates in the settings menu and install them to improve performance.
Use a Multimeter: This tool helps you test electrical connections. Use it to ensure the wiring harness delivers power to the head unit.
Consult a Professional: If you’re stuck, don’t hesitate to seek help from an experienced installer. They can diagnose and fix issues quickly.
Test Features Regularly: After installation, test all features, including navigation, audio, and smartphone integration. Identifying problems early makes them easier to fix.
By addressing these issues, you’ll ensure your Vellfire Alphard Update to new 40 series Android Head Unit works flawlessly. Troubleshooting might seem daunting, but with patience and the right approach, you’ll overcome any challenge.
Benefits of the Vellfire Alphard Update to New 40 Series Android Head Unit
Upgrading your vehicle’s head unit isn’t just about keeping up with technology. It’s about transforming your driving experience into something more enjoyable and efficient. Let’s explore the key benefits you’ll gain from the Vellfire Alphard Update to new 40 series Android Head Unit.
Enhanced Features
The 40 series Android head unit brings a host of advanced features that elevate your car’s functionality. You’ll enjoy seamless smartphone integration through Apple CarPlay and Android Auto. These tools let you access navigation, music, and calls without distractions. The built-in GPS navigation ensures you never lose your way, even in unfamiliar areas.
The high-resolution display enhances visibility, making maps and media look crisp and vibrant. Some units also include built-in DSP (Digital Signal Processing), which improves audio quality. This means your favorite songs will sound richer and more immersive. Additionally, the system supports a variety of apps, giving you endless options for entertainment and productivity.
Did you know? Many 40 series head units allow you to customize shortcuts, so you can quickly access your most-used apps or settings.
Modern Aesthetic
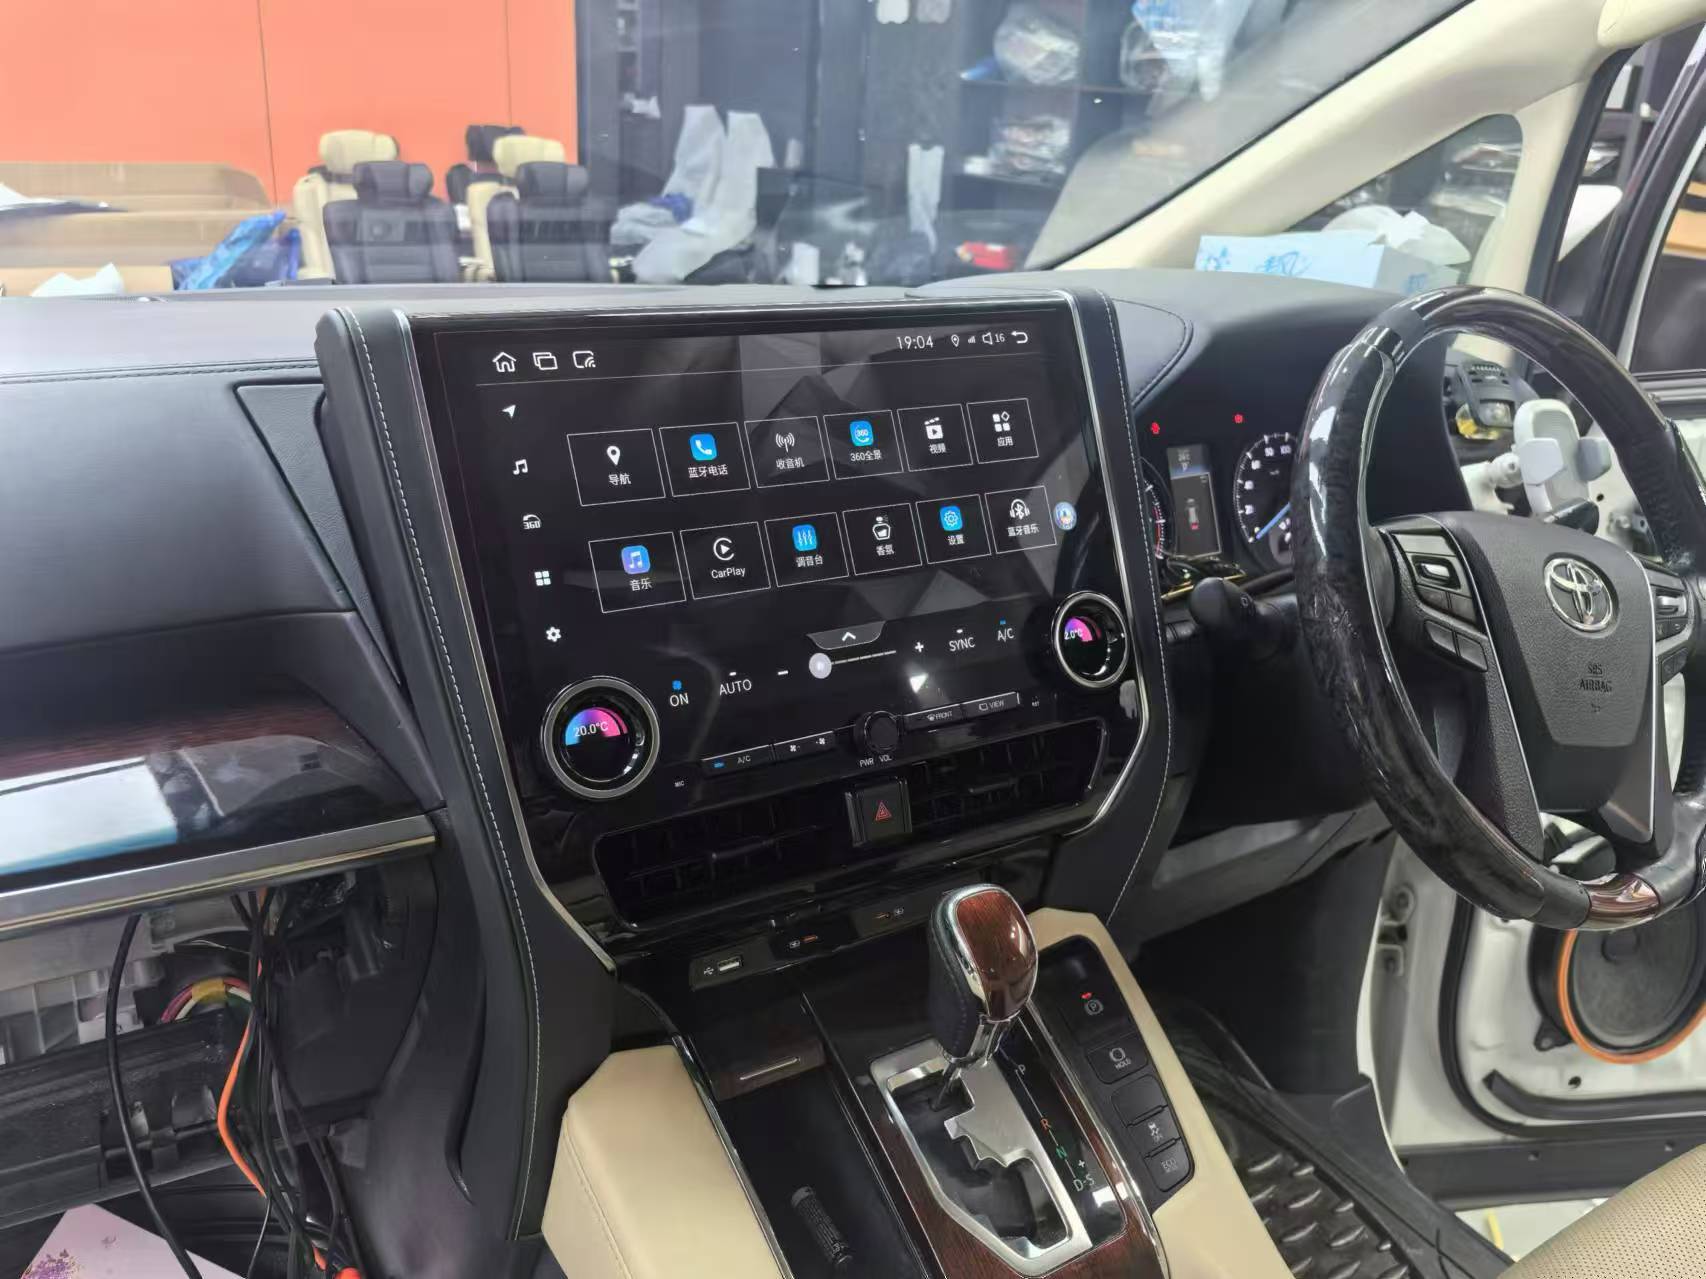
The new head unit doesn’t just improve functionality—it also upgrades your car’s interior design. Its sleek and modern appearance blends perfectly with the dashboard of your Toyota Alphard or Vellfire. The high-quality materials and polished finish give your vehicle a premium look.
The large touchscreen display adds a futuristic vibe to your car’s cabin. It replaces outdated buttons and knobs with a clean, minimalist interface. This not only makes your car look more sophisticated but also simplifies how you interact with the system. The result? A driving environment that feels both stylish and user-friendly.
By choosing this upgrade, you’re not just enhancing your car’s tech capabilities. You’re also giving it a fresh, contemporary aesthetic that matches today’s standards.
Upgrading to the 40 series Android head unit transforms your Toyota Alphard or Vellfire into a modern, feature-packed vehicle. You’ll enjoy improved navigation, seamless smartphone integration, and enhanced multimedia options. The upgrade also boosts your driving experience with better engine response, reduced noise, and improved fuel efficiency. Safety gets a significant boost too, thanks to an upgraded front camera and radar sensor. By following this guide, you can complete the Vellfire Alphard Update to new 40 series Android Head Unit with ease. If challenges arise, consulting a professional ensures a smooth and hassle-free process.
FAQ
What is the 40 Series Android Head Unit, and why should I upgrade?
The 40 Series Android Head Unit is a modern infotainment system designed for vehicles like the Toyota Alphard and Vellfire. It offers features like Apple CarPlay, Android Auto, GPS navigation, and high-resolution displays. Upgrading to this head unit enhances your driving experience with better connectivity, improved navigation, and superior audio quality.
Is the installation process truly plug-and-play?
Yes, the installation process is mostly plug-and-play. The wiring harness included with the head unit simplifies the connection process, so you don’t need to cut or splice wires. However, having the right tools and following the installation steps carefully ensures a smooth process.
How do I know if my Toyota Alphard or Vellfire is compatible?
To check compatibility, identify your vehicle’s model and production year. Then, review the specifications of the 40 Series Android Head Unit to confirm it fits your dashboard and integrates with existing features like steering wheel controls and rear cameras. If unsure, consult the product description or contact the retailer.
Can I install the head unit myself, or should I hire a professional?
You can install the head unit yourself if you’re comfortable with basic tools and following instructions. The process is straightforward with a plug-and-play setup. However, if you’re unsure or encounter issues, hiring a professional installer ensures everything works perfectly without risking damage to your vehicle.
What tools will I need for the installation?
You’ll need a few essential tools, including screwdrivers, trim removal tools, a socket wrench set, and a multimeter. These tools help you remove the old head unit, secure the new one, and check electrical connections. Having these on hand makes the process easier and faster.
What should I do if the head unit doesn’t power on after installation?
If the head unit doesn’t power on, check the wiring connections first. Ensure all connectors are securely plugged in. Inspect your car’s fuse box for a blown fuse and replace it if necessary. If the issue persists, use a multimeter to test the power supply or consult a professional.
Will the new head unit work with my steering wheel controls?
Yes, most 40 Series Android Head Units support steering wheel controls. After installation, you may need to configure the controls in the system settings. If they don’t respond, double-check the wiring connections or consult the user manual for guidance.
Can I use my favorite apps like Spotify and Google Maps?
Absolutely! The 40 Series Android Head Unit supports popular apps like Spotify, Google Maps, and Waze. You can download these apps directly onto the head unit or access them through Apple CarPlay or Android Auto. This makes navigation and entertainment more convenient.
How do I update the firmware on the head unit?
To update the firmware, connect the head unit to a Wi-Fi network. Navigate to the system settings and check for available updates. Download and install the updates to ensure your head unit runs smoothly and has the latest features.
What are the benefits of upgrading to the 40 Series Android Head Unit?
Upgrading gives you a modern infotainment system with seamless smartphone integration, enhanced navigation, and premium audio quality. The high-resolution display improves visibility, while the sleek design upgrades your car’s interior. It’s a worthwhile investment that transforms your driving experience.
See Also
2024 Update: Enhancing Mercedes Vito Radio with Android 12
2024: Revamping VW Golf 6 Climate Control System
2024 Overview: Comparing Android Auto Features for Motorcycles
2024 Guide: Installing Apple CarPlay Display on Motorcycles
Enhance Your Motorcycle Experience with Top Apple CarPlay Screen
Follow Us
Audiosources shenzhen Limited is a high technlogy manufacture which was founded in 2006 yeas. The company's main products include Android car dvd player, carplay ai box, car climate panel, carplay screen,ect.
We have our own R&D team,can delop the OEM and ODM projects for different demand. we already did ODM products for Mecerdes Benz, Volkswagen, Toyota brand cars. welcome to inquiry and order. Thanks.
Address
3rd Floor, Building 1, Haopeng Wisdom Park, No. 141-1 Furui Road, Xintian Community, Fuhai Street, Baoan District, Shenzhen,Guangdong , China
Contacts
sale3@audiosources.net

© Copyright 2024 My First Blog - All Rights Reserved.